Part One – ARROW Flying Wing

The first of the prepared experimental models is the ARROW flying wing model.
Why experimental?
Because you can build and operate it in several ways. You can also modify it experimentally according to your own ideas. Its parts can later be reused in other models as well.
What will you need to build the model?
A copy of the cut-out template printed on high-quality paper with a weight of 150–170 g/m² (matte photo paper), glue (a glue stick such as Herkules), one or preferably two paper clips. Optionally, a straight floral wire with a diameter of 0.6 mm (available at any flower shop) and blotting paper. You will also need a ruler, sharp scissors (they don’t have to be pointed, but must be sharp), and a toothpick.
Please read the entire instruction manual before starting the build.
Instructions for the basic version of the model
We begin by cutting out the main wing part No. 1. Cut it out as precisely as possible along its outline (black line). Then, using a ruler and a toothpick, “score” the paper along the yellow line. Place the wing part on a firm, smooth surface. Place the ruler along the yellow line and run the toothpick along it in one stroke. This will create a fine groove in the paper.
Turn the wing over so the white side faces up. Now gradually bend all three sections of the leading edge of the wing (part No. 1) upwards. Place the ruler along the groove and carefully bend the paper along it.
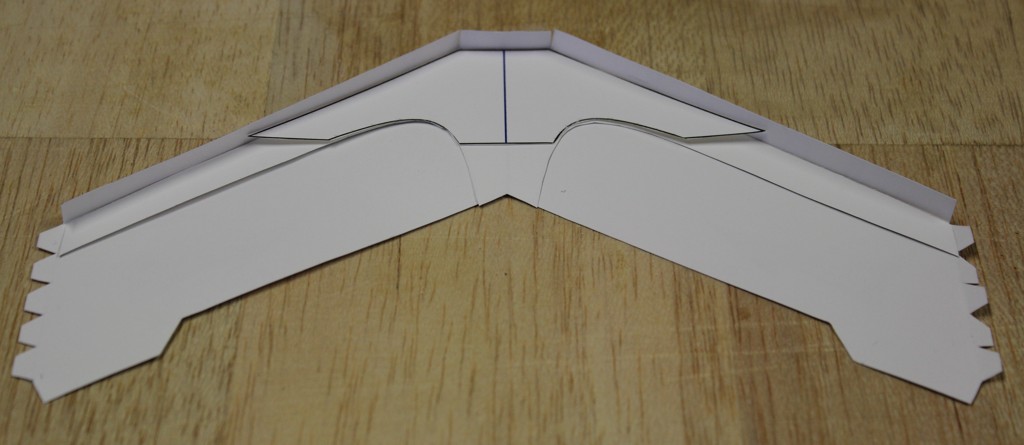 Cut out wing parts No. 2 and 3. Glue both parts one by one onto the underside of wing part No. 1.
First glue part No. 2, then part No. 3 on top of it.
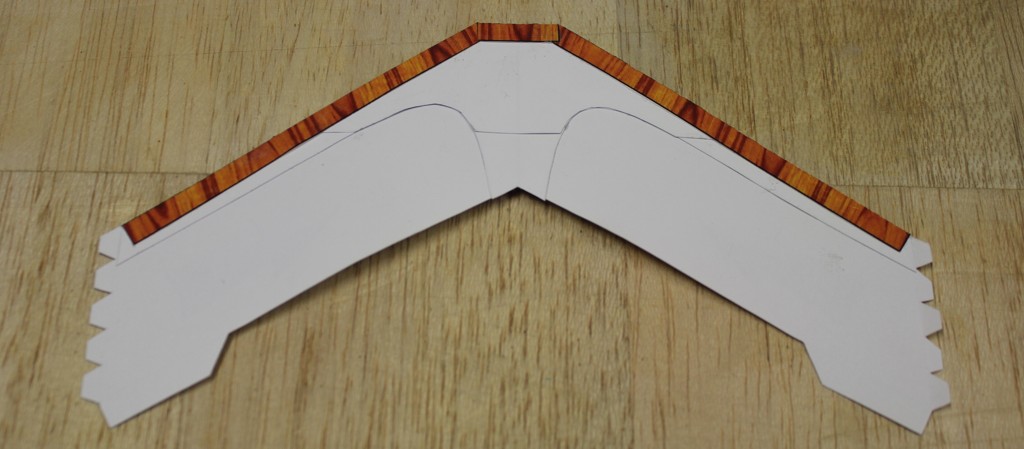
Then finish bending the leading edge of the wing (part No. 1) and glue it to parts No. 2 and 3. Place blotting paper on the wing. Weigh the wing down on a flat surface and let it dry thoroughly. A flat wing surface guarantees good flight performance. Throughout the gluing process, make sure not to apply glue to areas that are not meant to be glued (to prevent the blotting paper from sticking to the wing).
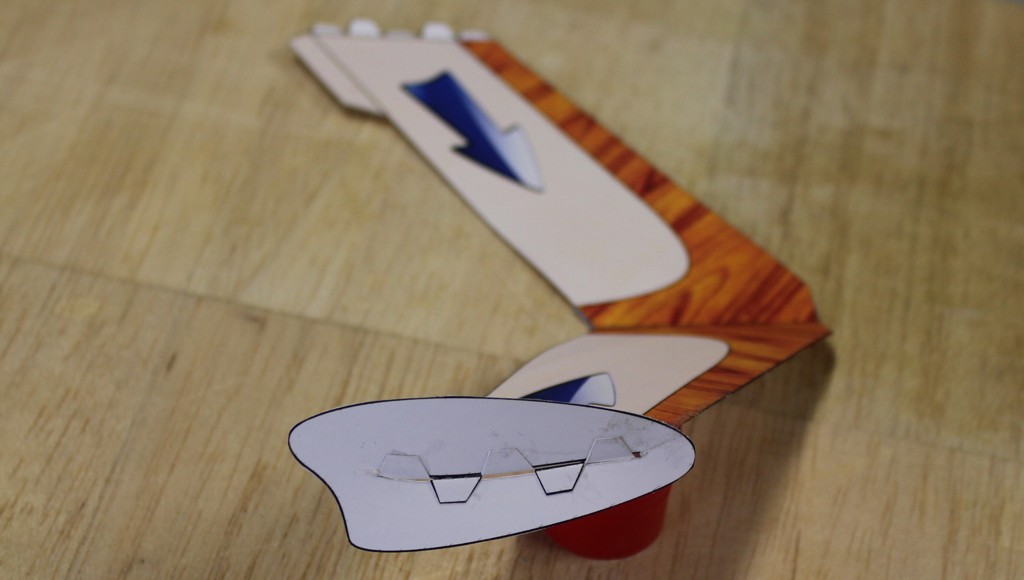
Now assemble the fuselage. Cut out fuselage parts No. 6 and 7.
Proceed in the same way as with the wing. First glue all parts No. 7 together, then attach parts No. 6 to their sides.
Place the nose section of the fuselage between blotting papers, weigh it down like the wing, and let it dry thoroughly. Cut out parts No. 4 and 5. Carefully cut a slit in part No. 4. Work as precisely as possible here, as accuracy directly affects the model’s flight performance.
After the wing has dried, carefully bend it upward in the middle using a ruler. The distance between the bent wing tips and the surface should be about 5 cm. Gradually glue stabilizers No. 4 to the ends of the wing.
Insert part No. 1 through the slit in part No. 4 up to the edge of the white areas (up to the yellow fold line). Gradually bend the white tabs at the wing ends up and down and glue them to part No. 4. Once the joint is dry, glue part No. 5 onto part No. 4. Let everything dry.
Insert part No. 1 through the slit in part No. 4 up to the edge of the white areas (up to the yellow fold line). Gradually bend the white tabs at the wing ends up and down and glue them to part No. 4. Once the joint is dry, glue part No. 5 onto part No. 4. Let everything dry.
Finally, firmly glue the fuselage to the wing. Spread the white tabs and glue them to the center of the wing. This also fixes the wing’s dihedral angle.

Test flying the model.
In this section, I will describe the basic trimming of the model (more details next time).
The key to success is a well-built model with a straight, untwisted wing.
Attach one paper clip to the nose of the model.
Throw the model gently forward at a slight angle. It will take some practice to judge the throwing force and a bit of patience. Don’t be discouraged if the model doesn’t fly perfectly the first time.
Once you achieve a gliding flight, carefully observe its behavior.
If the model drops quickly to the ground, gradually move the paper clip closer to the wing. The flight should become longer.
If the model oscillates during flight, move the paper clip away from the wing, or add a second one. Adjust the model until you achieve a smooth gliding flight.
If the model turns to one side, you can compensate by slightly bending the flap upward on the opposite wing half from the direction it turns.
After successful trimming, you can launch the model using a regular rubber band to achieve longer flights.
Photo of the ARROW model
Cut-out template file